Showing posts with label fiber dyes. Show all posts

Sunday, May 20, 2012

Frequently Interrupted Quilt Finished At Last

I've finished the long-deferred quilt project at last! Here it is quilted but unbound. I hung it on the clothesline where I photographed it in the process of deciding whether to add a border. I decided it looked fine with no border, so I bound it with the same white muslin in the blocks.

This has been an experimental quilt from the start. It was one of my first dyeing projects, and I chose half-square triangles for piecing practice. I experimented sewing the blocks together with the serger when the serger was brand-new, and I also used the serger as part of the "quilt as you go" assembly. Below, I've listed the four websites that helped me the most in understanding how to combine assembly and quilting processes into a manageable method that doesn't involve a quilting frame or a long-arm machine. I must also add that the quilt-as-you-go technique using the serger gave me a neater, more nearly square finished project than my sad attempts at traditional quilting.


  • Mama Melino's Lasagna Quilting (pdf file) is subtitled "Gotta Get It Quilted." Most of the "lasagna quilts" the search engine turns up are made of long fabric strips, but Paula Melino shows you how to turn a set of traditionally-pieced blocks into a finished quilt without ever stuffing a big roll of fabric under the arm of your sewing machine. This is where I got the idea to use the serger to assemble the quilt in big chunks. It worked really well on this project, and my quilt ended up much closer to "square" than it ever has assembling by regular sewing machine or by hand.
  • Crazy Shortcut Quilts: Marguerita McManus shows you how to quilt individual blocks and then assemble them with narrow strips. This is the process I'm going to try next.
  • Marianne, of "The Quilting Edge" offers photo tutorials and text instructions for her own quilt-as-you-go method. It's also a real treat to see her quilts as she builds them.
  • Melody Johnson's quilt-as-you-go technique is similar to Marianne's, and her quilts are similarly inspiring.

Of course, having white thread on the serger and sewing machine inspired me to sew up these underbritches and tuck them in my lingerie drawer. More fabric scraps put to good use.

Sunday, February 12, 2012

Looking Forward (and Back) to Dyeing Adventures


I really enjoy dyeing fabric and fiber. This is a three-yard length of cotton/linen blend, dyed last summer. I can never resist tossing a few fabric scraps into the dye-bath, just to see what happens. These over-dyed scraps are indigo denim, black denim, and a cotton print.


Dyeing projects outdoors in the summer is the most pleasant way to work, but, unfortunately, at that time of year, we seldom have enough water in the well for the recommended amount of rinsing. I'm always looking for ways to get color-fast fabric with minimal water use. That's why I was very excited to find Melissa Will's Fabric Dyeing 101. In her hand-dyed fabric business, she's worked out a process that conserves water, electricity, and price-y fiber dyes. She's put together three e-books (priced for the frugal among us) detailing her methods for dyeing, for teaching dyeing workshops, and for managing a home-based business. (The business book is free, and a very enjoyable read, whether or not you're contemplating a fabric-dyeing business.)

Once I finish a few projects and clear some work space, I'm looking forward to trying her methods on a small scale, indoors.

Melissa's put up a link collection recently. It includes Paula Burch's dyeing pages, where I learned much of what I know about fabric dyes, and Melody Johnson's "The Lazy Dyer". It was Melody's blog that pointed me to Melissa's e-books, and I found Melody through a search for modular knitting patterns almost exactly a year ago.

Fabric Dyeing 101

Saturday, January 28, 2012

Feature-Rich Rambouillet Wool Socks

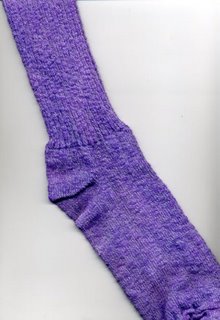
Here's my most recent knitting--socks from my crock-pot-dyed, hand-spun Rambouillet fleece. Several years ago, I decided that this neppy, lumpy wool was not a failure, but an interesting exercise in color and texture: It's Not a Nep, It's a Feature. I tried out a few interesting rib and cable patterns, but they lost all definition in this "highly-textured" yarn, so in the end, it was plain old "Knit 2, Purl 2" ribbing. It was a fun, mindless knit, and these soft, soft socks are a treat to wear.

Sunday, January 04, 2009

Batik--Water Soluble and Low Cost

It's been a long time since I got out the fiber dyes...I'd like to get back to it. A new (to me) technique really caught my attention last summer, and it's been sitting in a directory waiting for a break in my project stream: Flour Paste Batik from Bridget Benton at The Matchbook.

I love traditional batik, and every time I buy something from Dharma Trading Company, I end up drooling over their batik supplies for a while. The process is no more messy than many of my other favorite pastimes, but if you need to really get every last bit of wax resist out of your project, dry-cleaning chemicals are the way to go. Here in the country, there are no dry-cleaners, and no shipping or delivery of volatile chemicals. (Not to mention the hazardous aspects of those lovely organic solvents.) That's the beauty of Bridget's flour resist--it's water soluble! I am definitely going to try this. Sometime soon, I hope.

Thursday, November 06, 2008

Textile History and the Battle of Droop Mountain

Today is the anniversary of the 1863 Battle of Droop Mountain. The reenactors visited last month, when the weather is more likely to be pleasant, but 145 years ago, the Yankees were bombarding our ridge with cannon fire, and the Confederate troops were dug in across the road, where you can still see the remains of their earthworks in Droop Mountain Battlefield Park.

Pearl S. Buck's novelized biography of her mother, Caroline Stulting Sydesntricker, The Exile (1936) includes an account of that battle, a major event in Carie's childhood memories. This book is out of print, unfortunately, because I think it is one of Buck's best works, and its it gives a vivid impression of time and place. Here's a favorite excerpt:

The postwar period in the life of the little West Virginia town [called Hillsboro now] was one of deep spiritual fervor coupled with necessarily ascetic living. This atmosphere was the air which she breathed in her youth, and which forever placed a check upon a nature that was at heart sensuous and beauty-loving. But it gave also the opportunity for experience of many sorts and in this her varied mind delighted. I remember her saying once, "I have done every kind of work needed to maintain life and I am glad of it. After the Civil War there were no shops, nothing to be bought. We grew our own flax and we spun linen thread and made our own sheets and table cloths and inner clothing. We dyed our dresses from cotton and linen thread we had made ourselves and we wove it. I learned to know what colors could be made from different herbs and barks and from roots of many kinds. Sometimes our experiments were failures and we had to wear them just the same. And we sheared sheep and washed the wool and carded it and spun it and wove it. I am glad I learned how to do everything."

This has been my standard of textile austerity for the Civil War era, but not long ago, I ran across an excerpt from Godey's Lady's Book, 1866, entitled Dress Under Difficulties: American Civil War Fashions in the South During the Blockade. Whoever wrote this had a different definition of austerity.

Let those who have never experienced it set their imaginations to work and conceive, if they possibly can, what must have been the condition of ladies in society - and very gay society, too - cut off for four years from their supplies of new dresses, shoes, gloves, linen, buttons, pins and needles, ribbons, trimmings and laces, not to mention the more urgent necessities of new bonnets, hoop-skirts and fashion-plates! How we patched and pieced and ripped and altered! How we cut out, and turned and twisted; how we made our new dress out of two old ones; how we squeezed new waists out of single breadths taken from skirts which could ill spare a single fold; how we worked and strained to find out new fashions and then worked and strained a little harder to adopt them - all these things form chapters in the lives of most of us, which will not be easily forgotten. Those who wish to learn economy in perfection, as well as those who interest themselves in curious invention, will do well to study the experience of the blockaded devotee of fashion.

Tuesday, June 17, 2008

Dyeing My Couch

Last weekend I made a new futon cover. It's hard to find fabric of any kind in these parts, so I ordered a length of cotton duck from Dharma Trading Company (along with a bunch of other cotton and silk fabrics for future projects). After I washed and preshrank the duck cloth (from the Dutch word doek, not the waterfowl,according to Wikipedia), I dyed it shades of green. You can see in this photograph the fabric (in the early morning mist) alongside the color inspiration.

I used what Paula Burch calls the low water immersion technique, with Procion dyes. Duck cloth is too coarsely woven to show the delicate color gradations this approach to dye application can produce on silk and fine cotton, but the pleat patterning did give pleasing results. Here's my step-by-step procedure.

  1. Washed the 10-yard length of duck, and dried it on high heat for maximum shrinkage.
  2. Cut fabric to length of couch. Luckily, the fabric was wide enough to allow me to use only two futon-lengths.
  3. Weighed the cut yardage to determine how much dye to use. The Dharma Trading catalog has charts that tell how much of each Procion dye color to use per pound of fabric. The 4.25 pounds of duck cloth required 1 ounce of "Golden Yellow" dye and 2.125 ounces of a mixture of "Midnight Blue" and "Electric Blue." I didn't have enough of either dye to make the full amount needed.
  4. Folded the fabric lengths in half, then accordion pleated them, coiled them, and placed each in the bottom of a plastic bucket. (I divided the dye and fixative solutions between the buckets.)
  5. Poured just enough hot water on each piece of fabric to completely wet it.
  6. Dissolved the yellow and blue dyes in separate containers. I know from experience that the yellow and blue Procion dyes migrate through fabric and "strike" at similar rates. Since I wanted different color intensities in different areas, I poured the yellow dye on the fabric, with just enough water to cover the fabric. I waited 30 minutes, then added the blue dyes the same way.
  7. After 60 minutes, I added a solution of soda ash (washing soda) to each bucket. I used 1.5 cups of soda ash for 4.25 pounds of cotton (calculated from the Dharma Trading Company table). I used about a gallon of water to dissolve the soda ash, and I poured the fixing solution on slowly, down the side of the bucket.
  8. After the fabric mixture stood overnight (about 14 hours total) I rinsed out the dye, washed the fabric again, and hung it on the clothesline to dry.
  9. Ironed the fabric and sewed the two pieces together in a big pillow case. I pulled this over the mattress, and hand-sewed the open ends together. I used to put zippers in these futon covers because the ready-made ones had them, but zipping and unzipping was not much faster than stitching and unstitching, and it was a nuisance to put in those long, long zippers.

Sunday, January 20, 2008

A Little More Spinning

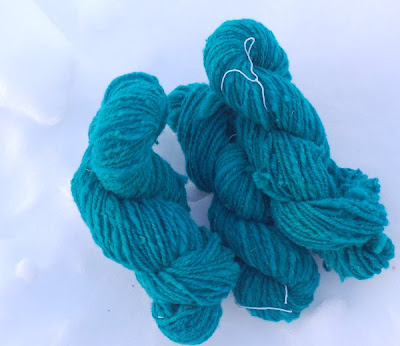
Teal handspun wool from local sheep

Here's a little more of that troublesome local fleece, dyed, carded, spun, and re-washed. It's interesting how much color difference there is between the carded bats and the spun wool. While I'm not using up my fiber resources, I am making them much more compact!

Close-up of teal wool

Saturday, January 19, 2008

Tea Dyeing to Take It Further

I've been working on the Take It Further Challenge project for January, although I have no pictures to show my progress. I successfully transfered the ink jet printed images of Emma Bell Miles and her illustrations onto a thin, bright-white cotton. I've decided to make 13-inch quilt blocks, and I've found that there's only room for one image per block, even though I thought I'd made them quite small. I intend to use the quilt blocks to make window quilts, so they must be soft and thin enough to drape like curtains. That means avoiding embellishment or quilting that would make the resulting fabric too heavy or stiff to drape well.

I'd planned to use my rayon and polyester fabric scraps, and also my hand-dyed fabrics, but I've found I don't have many hand-dyed pieces left, and what I have are bright floral colors that overwhelm the delicate, vintage images I've transfered to fabric. I'm not going to have time to replenish my hand-dyed collection this month, so I thought I'd take a few small pieces and mute them with tea dye. Because I always check the Web for directions, here are some links with a wide variety of (sometimes contradictory) advice on tea and coffee dyeing.

Friday, January 18, 2008

January Spinning Round-Up

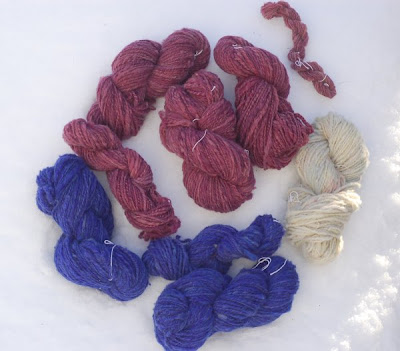
Yarn spun and washed in January, so far

The last few years, I've made an effort to make my fiber supplies more compact. I've sorted and used scrap fabrics in big projects and small. After visiting a going-out-of-business sale, I haven't had to buy yarn since 1992 (although I swapped work for a huge horde of dyeable New Zealand wool last summer.) I don't really need to go on a fiber diet anymore; in fact, I need to find sources to buy fabric for clothing and upholstery, and I've run very short of hand-dyed fabrics.

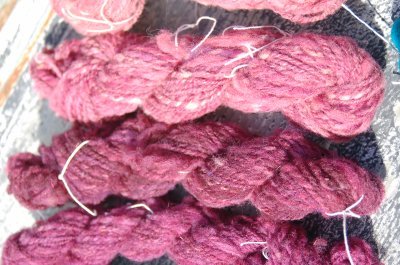
I do have a backlog of dyed, carded fleeces waiting to be spun, however. Since the first of the year, I've been spinning a little bit every day, and these are the results. These fleeces are from local sheep, Suffolk-Dorset crosses raised in pastures full of burdock. With short cuts, mats, neps and plenty of "vegetable material," most hand-spinners throw stuff like this away, but I always need to find out what I can do with the materials at hand.

I picked over these fleeces as best I could, washed them in Dawn dishwashing detergent in garbage cans in the back yard, and dried it outdoors. Then I picked the locks open and threw away more short cuts and burdock seed heads. I dyed the wool in an old crockpot. My technique involved dissolving Jacquard Acid Dye in a small amount of water, pouring it in the crockpot, and stuffing in as much wet wool as possible, finally adding enough water to cover. (This over-stuffing makes the dye take unevenly, giving a nice, heathery effect in the spun wool.) After the water and wool got hot and had simmered for an hour, I added 1/4 to 1/2 cup of white vinegar from the grocery store, and let the wool simmer until all the dye came out of the water and went into the wool. It's easy to tell when acid dyes are exhausted--the water clears!

The great thing about dyeing this sort of dirty wool before carding and spinning is that the burdock, dirt, and other vegetable materials fall out more easily, and you don't have to wonder what zoonoses you might pick up from the sheep.

After the wool dried, I carded the colorful locks on my drum carder, making bats. At this point, one can blend colors, but the uneven dyeing technique actually makes this unnecessary.

Close-up with rose-colored wool

Sunday, December 23, 2007

Freehand Machine Embroidery

Guatamalan weaving--Resplendent Quetzal

In the spirit of something new for the new year, I've been experimenting with some unfamiliar sewing techniques. I've always been fascinated by the freehand embroidery effects some people achieve with their sewing machines. I experimented a bit with the pattern stitches on my 1971 Singer and on my newer White/Viking machine when I made these window quilts the winter before last. What I hope to do is combine fabric dying or painting, applique, and freehand machine embroidery techniques to make patchwork blocks. This quetzal weaving is only a small part of my eclectic fabric collection, after all. Here are some links I've found helpful or inspirational, or both.

Saturday, December 22, 2007

Quetzal Quilt

Quetzal quilt in the snow

I bought this Guatemalan wall hanging in Costa Rica in 1984, and recently, I decided it would be better used as a window quilt than folded in a box of other fabrics. I added a few strips of denim-weight fabrics, backed it with scraps of red sweatshirt fleece left over from my denim rail fence patchwork, and made the binding from my first attempt at hand-dying fabric.

I sewed on a few buttons by way of tying the top to the backing. I had a bowl full of buttons selected for embellishment, but I decided they would detract from the bunnies and quetzals.

I saw quetzals regularly in Costa Rica, and I enjoyed photographing this project in the West Virginia snow, so far away from the Guatemalan weavers and their familiar birds.

Quetzal window quilt

Thursday, November 29, 2007

Dr. Bootsie Learns About Social Networking

NABLOPOMO 2007 Badge

I've nearly finished NaBloPoMo 2007, a group enterprise where members pledge to post at least one blog entry per day for the month of November. The organizers made a website with a list of participants, and used social network software to do the job, because the 2006 list of participants was large and hard to manage. Once you signed up for the project this year, you could join groups, post pictures, video, and text on their website as well as your own, and participate in forums.

It sounded great--unfortunately, every time I visited the site this month, it crashed my browser, an up-to-date version of Firefox. I even had to reboot my computer several times, and I run *nix, so that never happens. Thus, Nablopomo2007 didn't show me interesting new blogs to read. In fact, when I was able to view other participating blogs this year, I mostly saw splogs (spam blogs), blogs with but a single post, and blogs not updated even once in November. Very disappointing, but that is often the price of Internet popularity.

In the "Gains" column, I've had no trouble finding something to post every day, and last year's Nablopomo participation prompted me to near-daily posts as a regular practice. Also, this unsuccessful (for me) social network led me to join Ravelry, a social network for people who knit, crochet, and/or spin. I've been trying to figure out if social networking has any use for people past adolescence (literally and/or figuratively). So far, Ravelry functions as it's meant to, and does not make me reboot Debian Etch to get rid of phantom processes that gobble up all the CPU and RAM. Ravelry creators want to reassure us that their project is suitable for adult-like behavior:

Ravelry is not MySpace:

Don't tell Jess that she's Tom. Jess doesn't want to be Tom.

Yes - it's a community site, but Ravelry isn't just a place to hang out with friends. Even people who aren't interested in being social can get a lot out of Ravelry.

Oh, and music doesn't start up every time you turn the page.

I'm not sure if Ravelry is something I'll use much, as I'm not the most sociable knitter, but it's well-designed, efficient, and intriguing. It'll be interesting to see how it develops.

A disclaimer at Ravelry's request-- Membership is by invitation, but to be invited, all you have to do is sign up with your e-mail address, and in a few days, they'll get you enrolled. This is because they are still in "beta" (aka "under construction") and can't handle lots of new members instantly, not because new members are "evaluated" somehow.

Monday, May 07, 2007

Compression Dyeing Cotton Jersey Yardage

Compression-dyed cotton jersey

This weekend's project has been dyeing some cotton jersey cut yardage. I wanted to duplicate the effects I got from "baggie dyeing" woven cotton yardage, so I poked around the Internet and assembled this library of links.

Procedure used on this fabric: I accordion-pleated the wet fabric, coiled it in a wash pan, and poured on my dye solutions (Procion MX dyes, "fuchsia" and "turquoise"). After half an hour, I added the alkaline fixative (soda ash) the same way. After a few hours I turned the fabric over so that both sides of the fabric would stand in the shallow fixative solution. I let it stand about 16 hours at 80 degrees F before washing. It doesn't duplicate the delicate detail of the small batch methods described below, but it'll do.

The following references show how to hand-dye small amounts of fabric to create a "palette" of different fabrics for quilting and other patchwork projects. I find the techniques don't necessarily scale up from quilters' fat quarters to yardage sufficient for a garment, but I really like the looks, especially the color gradient dyeing projects in Adriene Buffington's book and Heidi Lund's study group project.

Monday, March 05, 2007

Silkscreening--Tutorial and Inspiration

You find fiber arts tutorials in the oddest places. This excellent tutorial, "How to Silkscreen Posters and Shirts" comes from No Media Kings, aka Jim Munroe, "a novelist who left HarperCollins to showcase and propagate indie press alternatives to Rupert Murdoch-style consolidation." He connects silkscreening to these topics thus:

Silkscreening is such a great happy medium--nestled comfortably half-way between hand-drawn and mass production, more colourful than photocopying and with an aesthetic all its own. Artist Shannon Gerard broke out her silkscreening gear to make cool shirts and posters for her upcoming comic launch, and despite being crazy busy has shared her skills in this funny and detailed tutorial

The comments section is also instructive--don't skip them. Silkscreening has been "on my list" of must-try activities for years. I hope this will push me into action this year.

Friday, October 20, 2006

Dying For the Weekend

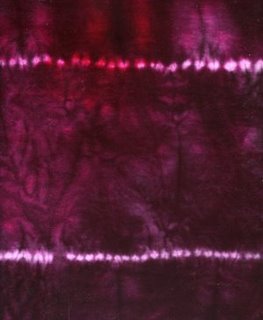
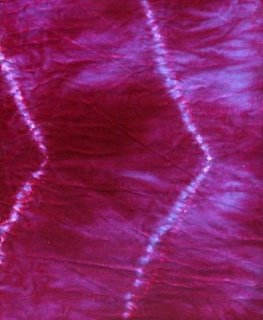
purple velvet scarf sample red and blue velvet scarf sample

Last summer, in an attempt to "generate a new income stream," I decided to try dying silk velvet yardage and sew scarves from it. I hoped this project would pay for itself, and for a good electronic scale I could use for all my dying recipes. (Measuring spoons were increasingly inadequate for my purposes.) I had no sooner gotten my materials together than the substitute teacher gig turned up. Between the classroom and the kitchen (where I was frantically canning garden produce), the dying project dwindled from a scarf or two per weekend down to one dye pot with all my leftover cotton socks.

Cotton sock dyed purple

I did, however, file a couple of dying links.

  • Paula Burch's "All About Hand Dyeing" has been on my bookmarks list for years, but she's recently revamped her Web site, adding new information and improving the look and feel


  • Dharma Trading Company has all the cool stuff from their catalog in an easier-to-use format. They have also added a "Projects" section, with how-to's for many different projects.

Wednesday, August 23, 2006

Spinning My Tiny Dye Lots

teal and pink yarns

Here's what I've been up to the last few days--dying some local (burdock-laden) fleece in the crockpot, carding, spinning and plying it. I've been experimenting with series of color intensity, trying to get pretty pastels. The more intense colors continue to work better for me. It is encouraging, however, that the colors consistently look better in the spun yarn than in the fleece after carding.

assortment of pink yarns

Sunday, September 04, 2005

Variety Through Dyeing

In hat-knitting mode, I've been using up a small stash of Chelsea Silk (65% silk, 35% wool) in a sort of natural heathery brown-blue-red. Because I didn't want to have three or four identical hats (my slogan is "Unique handknits") I tried dyeing one of them. I used a quarter teaspoon of pink Jaquard Acid dye, enough water to float the hat, and a quarter cup white vinegar. I cooked it all day in my second-string crock-pot (reserved for fiber dying), and I'm pleased with the results. Unfortunately, I have no better idea what to call this color than I had for the original undyed hat. Mauve?